How to Find and Photograph Stairs and Staircases

When it comes to stairs photography, composition is everything. Staircases give you so much to play with, but the trick is knowing what to look for and how to frame it. And that starts with curiosity.
Stairs interest me because they are connectors. They’re designed to move you from one place to another, and in abandoned buildings, they do that and so much more. These strange, suspended, half-functional relics lead either nowhere or someplace you probably shouldn’t go. That’s what first got me hooked on photographing them. Some of my favorite shots from the Flaunt Your Curves collection are of staircases: these everyday things that are actually really quite sculptural. There’s an elegance to a staircase that’s falling apart. And when you photograph it right, you’re showing a moment caught mid-collapse (or mid-hold-on).

Why Stairs Photography?
Staircases make incredible photographic subjects because they already come with built-in structure. Curves, lines, repetition, and symmetry. They offer perspective and depth, which is a huge gift when you’re working in unpredictable lighting or trying to make sense of a crazy, crumbling scene.
Sometimes staircases are showpieces, like in old mansions or theaters. Other times, they’re hidden away, meant for staff or storage or some long-forgotten maintenance route. But no matter what, they help give shape to a place’s history, and they’re often surprisingly intact.
One of the most striking staircases I’ve photographed was inside an abandoned house. It was a narrow spiral made of dark wood. Above it, a stained-glass window had somehow survived, and the colored glass threw soft reds and blues across the steps. The dark wood caught enough of it to make the curve glow towards the top. That image made it into the Flaunt Your Curves collection.

Composing the Shot
When I’m exploring a new site, I always make a mental note of any stairwells. Even if the rest of the building is mostly gone, the stairs are often still standing, and they usually lead to something worthwhile.
I usually start by walking the stairs (if they’re safe enough) and looking at them from multiple angles above, below, and side-on. Sometimes the best shot is off to the side, catching the bend of a bannister or the light falling in diagonally.
Start by looking for:
Light. A stairwell lit by a skylight or broken window can create incredible shadows and shape.
Curvature. Spirals, switchbacks, or elegant sweeping turns add drama and movement to a photo.
Texture. Rusted railings, peeling paint, and crumbling steps all help build a sense of place.
Angles. Try shooting from above, below, or through a gap in the railing.
Curved staircases are my favorite. They’re more fluid than straight ones and give your eye a path to follow. You can lean into that movement with your composition: use the spiral to draw the viewer inward, or let the curves carry their gaze from corner to corner. A lot of the images in Flaunt Your Curves came from me deciding to just let the shape of the stairwell guide me. You don’t need to overthink it. The architecture already has a flow, and you just have to capture it.

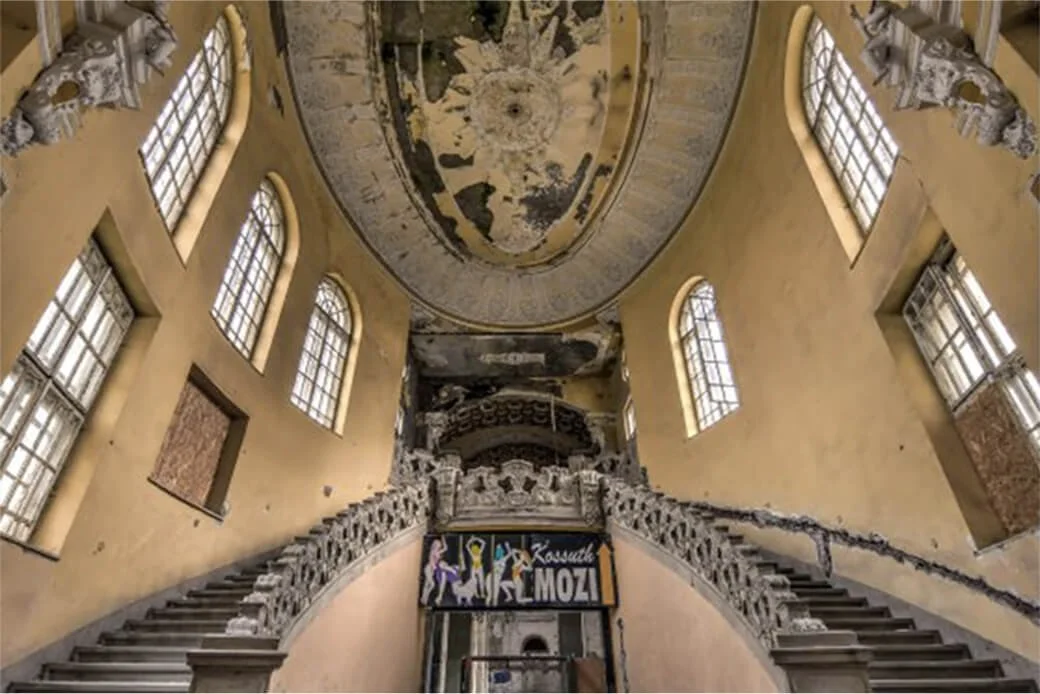
For example, with staircases like this one, symmetry is everything, but it’s not always obvious from the first glance. To highlight shape like this, I usually position myself low and centered, directly in line with the base of the bannister. From that spot, you get the full sweep of the staircase wrapping up and around, with the oval cutout above acting as a natural frame.
Lines play a huge role. Even in ruins, where things are cracked or shifted, there’s usually a sense of underlying balance. Lining up shots so that railings or step edges create clean diagonals or frames can be incredibly effective.
Lighting Tips for Stairwells
Natural light is the best friend of any urbex photographer, but it can be especially magical when you’re shooting staircases. If there’s a window or skylight nearby, staircases often act like light traps, catching beams and shadows in ways that make them feel cinematic. Late afternoon is ideal. The light is softer, and it tends to stream in at angles that highlight texture and curve.

If you’re working in a darker location, you can still make stairs photography work. I use bracket exposures (especially in older buildings with heavy contrast), then blend the shots later to bring out shadow and highlight detail. That’s what I did for this photo of the stairwell in an old abandoned home. It was dark at the bottom, but there was this light coming in from the two windows. HDR let me capture the whole mood without blowing out the windows or losing the steps entirely.

Safety for Stairs Photography
Stairs are often still standing when everything else is falling apart, but that doesn’t mean they’re safe. I’ve climbed plenty that looked solid, only to have a step break or creak halfway through. A few safety rules I stick to:
Test each step with your toe before putting full weight on it, especially if it’s wood.
Skip steps that are soaked, cracked, or pulling away from the wall.
Avoid leaning on the railing unless you’ve tested it. Some are strong, but others are basically decorative at this point.
Watch for missing treads or soft risers, especially in spirals. They’re harder to spot when you’re looking up through the camera.
If it doesn’t feel right, skip it. There’s always another angle from below or the side. I’ve walked away from some beautiful shots because the stairs didn’t feel safe, and I don’t regret it.

Final Thoughts
If you’re out exploring and come across a staircase (especially one that curves), don’t walk past it. Pause and look at how the light’s hitting it and try shooting from the landing, from the bottom, or even through the banister. If there’s a window nearby, bracket your shots so you don’t blow out the highlights. Watch your footing, though! Stairs in old houses can feel solid but still have soft spots.
If you’re curious what stairs photography can look like in action, check out the Flaunt Your Curves collection.
