Low Light Photography: Essential Techniques for Shooting in the Dark
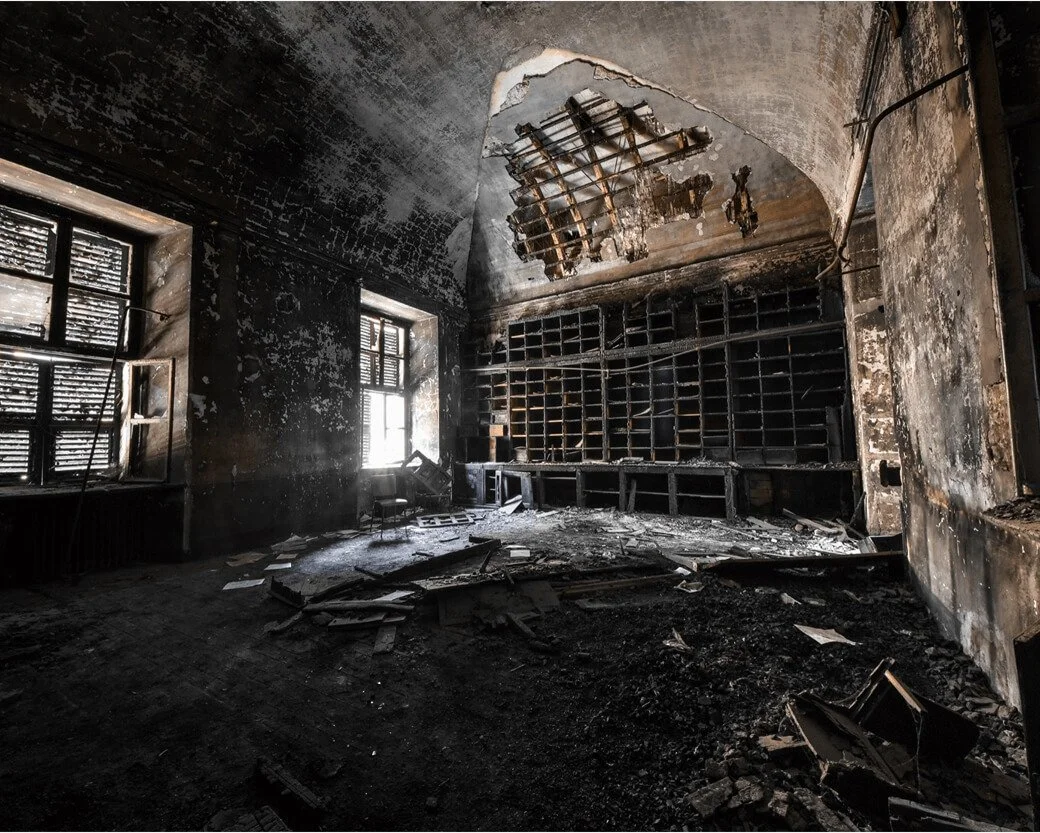
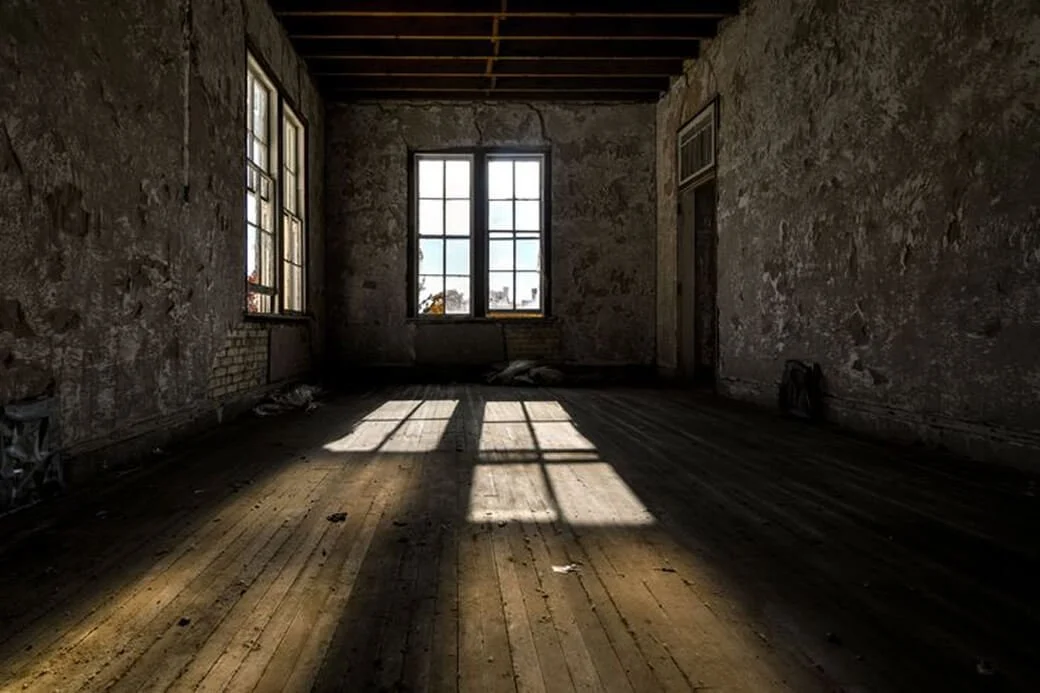
The upper floor of a derelict German hospital is almost completely dark. When I stepped inside, the only illumination came through windows so caked with grime they offered more suggestion than light. I had the tripod, the fast prime, and a few hours before the building became unworkable. What I didn’t have, and didn’t want, was a flash.
That decision is the foundation of all my low light photography: not because flash is inconvenient in urbex locations, but because it’s the wrong tool. These spaces communicate through their particular quality of darkness, and working with whatever light a space actually offers is what makes the images feel like the places they record.
These low light photography tips come from that commitment, covering the exposure triangle as it applies to dark abandoned interiors, the gear that moves the needle, and the post-processing workflow I use to manage noise and recover shadow detail.
Understanding the Exposure Triangle in Low Light
Low light photography forces trade-offs that daytime shooting rarely demands. The exposure triangle, ISO, aperture, and shutter speed, is the framework for managing them, and each element carries a specific cost in dark interiors.
ISO: Sensitivity and the Noise Trade-off
Raising ISO brightens the exposure but amplifies noise, the digital grain that appears first in shadows and then across the whole frame: the central tension in high ISO photography. Modern mirrorless cameras handle ISO 3200 far better than older DSLRs. I pushed to that limit in the boarded basement of the Racconigi asylum, where a single door ajar was the only light source. A noisy shot beats no shot, but ISO is the last lever I reach for.
Aperture: Opening Up
Wide aperture, f/1.4 or f/1.8, is the most effective adjustment available when shooting handheld in dim conditions. Each full stop doubles the light reaching the sensor. The trade-off is depth of field: at f/1.8 in a dim interior, holding both a foreground texture and a distant corridor in sharp focus isn’t achievable in a single frame. In tight urbex interiors where I want both foreground texture and background context in the same frame, I stop down to f/8 or f/11 to hold the full surface in focus.
Shutter Speed: The Stability Problem
A slower shutter admits more light but records camera shake. Handheld, the practical floor is roughly 1/focal length: about 1/30s for a 24mm lens. On a tripod, shutter speed isn’t a constraint. I regularly use exposures of 2, 5, and 10 seconds in abandoned interiors. At the Michigan Theater in Detroit, the converted parking garage space required 4-second exposures at ISO 400 to hold shadow detail in the former auditorium ceiling while keeping the brighter concrete ramps within range.
Why I Never Use Flash (and What I Do Instead)
What camera settings should I use for low light photography without getting too much noise? And the more fundamental question beneath it: How do I photograph dark interiors without flash? Both treat flash as the obvious solution to darkness. For this kind of work, it isn’t.
Flash doesn’t add light to a space. It replaces the light that’s already there with something artificial, and in an abandoned building, that existing light is the subject. A broken window backlighting a room of peeling paint creates a scene. A direct flash creates a snapshot.
For me, no-flash photography isn’t a technical workaround. It’s a commitment to treating available light photography as the primary creative tool. The shadows, the colour cast of old paint, the quality of light through dusty glass, it’s all information the image is supposed to carry.
What I use instead is whatever the space provides: broken windows, doorways, skylights, gaps in roofs, shafts through structural damage. I position myself relative to those sources and wait for the angle of light that works. When the dynamic range exceeds what a single frame can hold, I bracket, using my HDR approach to recover both highlights and shadows.
Gear for Low Light: What Actually Makes the Difference
Fast Lenses
The difference between an f/3.5 zoom and an f/1.8 prime in shooting in dark interiors is roughly three stops: ISO 400 instead of ISO 3200, or a workable 1/30s handheld instead of a blurry 1/4s. A fast prime is the single most effective low-light upgrade available.
I work primarily with a wide-angle fast prime in urbex locations, where the combination of breadth and maximum aperture is hard to replicate with a zoom. At the Michigan Theater, the atrium ceiling required a 24mm perspective to capture the full span of the plasterwork. Shooting at f/1.8 kept the ISO at 800 even in that deep interior, and the files needed far less post-processing noise work than they would have at f/4.
Tripod Use in Abandoned Buildings
The tripod removes shutter speed from the equation for static subjects, so ISO stays low and aperture is chosen for depth of field rather than light gathering. For urbex low light work it’s the most consequential piece of kit after the lens.
I use a mid-weight carbon fibre tripod that sets up quickly on uneven surfaces, paired with a two-second self-timer to eliminate shutter-press vibration. Both are part of the essential equipment I use for these locations.
Camera Settings in Practice: My Real-World Approach
Low light camera settings aren’t a formula. They shift depending on whether you have a tripod, how dark the interior is, and what the image needs in terms of depth of field. The following is how I work through that decision in the field.
When You Have a Tripod: Prioritise ISO and Aperture
With a stable camera, shutter speed isn’t a concern for static subjects. Set ISO as low as the camera allows, typically ISO 100 to 400, choose the aperture the image requires, and let the shutter be whatever it needs to be. On a DSLR, use mirror lock-up; on mirrorless, switch to electronic shutter. Pair either with a two-second self-timer to eliminate all vibration.
My starting point for a dark interior on tripod is ISO 200, f/4, then a test exposure to evaluate the histogram. At Racconigi, the main ward at midday in summer produced a 2-second exposure at those settings. The basement required 15 seconds at the same ISO and aperture.
When You’re Handheld: The Compromise
Without a tripod, the priority order reverses. Aperture first: as wide as the lens allows. Shutter speed second: the slowest value you can hold steadily, roughly 1/30s for a 24mm lens. ISO last: raise it until the exposure is correct, and plan to address the noise in post.
I often use available surfaces when the tripod isn’t practical. At the German hospital I worked quickly through several rooms by pressing the camera against doorframes and resting it on windowsills. Each surface extends the usable shutter speed range by a stop or two. The compositional attention I give to framing to achieve balance applies here too: a doorframe used for stability can double as a natural compositional boundary.
Post-Processing: Managing Noise and Recovering Shadow Detail
Dark interiors almost always produce files that need noise reduction. I shoot RAW in all low light situations, to preserve information that noise reduction software needs.
My primary tool is the AI Denoise function in Adobe Lightroom, which works directly on the RAW file using a model trained on noise patterns. For more aggressive noise reduction, I use Topaz DeNoise AI, which handles extreme noise without the smearing that older luminance sliders produce.
The workflow order matters: apply AI denoise before any other adjustment, then correct exposure and white balance. For bracketed sequences, merge the HDR first, since the merged file already has a better signal-to-noise ratio than any single frame.

The Light That’s Already There
The constraints of shooting in dark abandoned buildings are real. There’s rarely enough light, it’s rarely where you want it, and it shifts faster than expected. None of those constraints require flash.
The practical foundation is a fast lens, a tripod, and RAW files. Learn to bracket when the dynamic range of the scene exceeds what a single exposure can hold, and invest the time in post-processing that good noise reduction requires.
The deeper point is that available light, however difficult, is what makes these spaces worth photographing. The mood of a dim interior, the colour of old light through dirty glass, the way shadows settle in corners undisturbed for decades: none of it survives a flash. Working within what’s there isn’t a concession. It’s the whole approach, one that runs through everything in my Ripe Arts urbex series.